Random Projects and Comments

18 years of Thinkpad Tablet

So 38 days after I ordered it and 31 days after the original ship date I finally have a new Thinkpad Tablet.  Shortly after ordered it I remembered that I have a old Thinkpad Tablet from 1993.  When you look at some of the key features of both of them they are quite similar.

ThinkpadTablet-Old-New

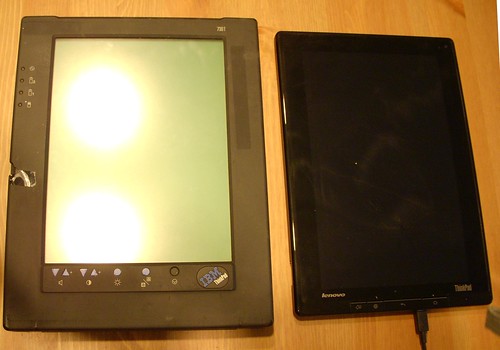
First off the size, they are both roughly the same size length and width, thickness is a different story.  Though screen size is nearly identical.  Unfortunately the 1993 version dosn’t power up any more as I do not have the OS cards for it, at some point in the past I had gotten linux running on it but have no idea where those flash cards went.  Also the batteries are completely shot.

Thinkpad Tablet Docks

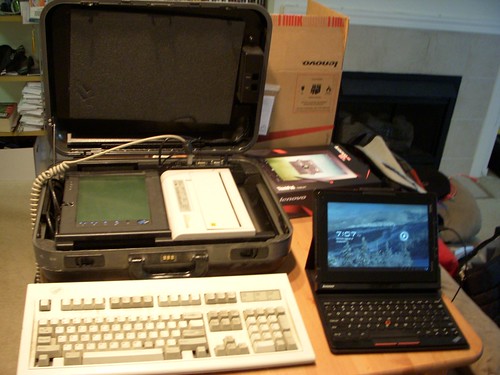
Both tablets also have available docking stations with keyboards.  The 1993 version would be a bit tougher to carry around every day.  But even the 2011 version is enormous by today’s standards when but into the dock.  Just for comparison the new Thinkpad Tablet in it’s keyboard ‘Folio’ as Lenovo calls it is bigger then my Lenovo s205 netbook which is pretty insane.  My biggest complaint about the new keyboard folio is that it connects to the only full sized USB port and does not have another on the folio.  I was intending to use the tablet to write this post, but realised to upload the photos I would have to remove it from the folio, then put it back in to finish typing.

OldThinkpadPrinter

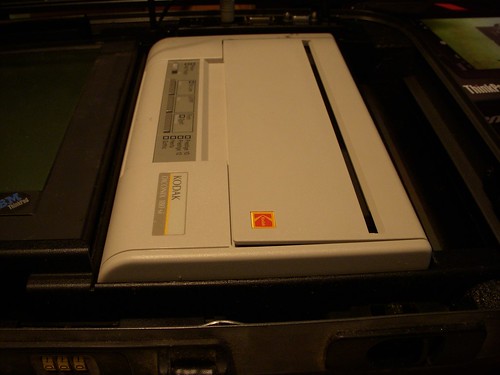
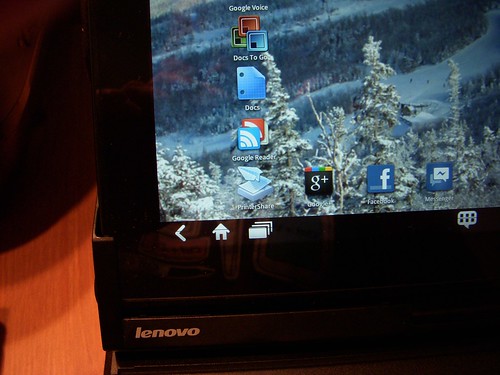
The next thing that IBM/Lenovo thought was important in both tablets was printing.  The 1993 version comes with a thermal printer in the dock, in 2011 Lenovo opted for a program called ‘PrinterShare’ being loaded. I don’t own a printer, and even at work I pretty much only use them for printing boarding passes so I really don’t have a use for either of these.

NewThinkpadPrinter

The the new tablet already feels more useful then the Blackberry Playbook which I’m currently using. I will still continue to use the Playbook, mainly for the Blackberry Bridge feature which is great, but the Thinkpad may become my tablet for ‘everything else’ already got some critical applications working that do not on the playbook such as the admin interface to Cisco Communications Manager which is a big one. I’m hoping to get a physical ethernet connection working via the USB host interface but that will be tougher.


Yikes! Invalid device signature.

Published on September 4, 2011, by in Hardware.

So, I got my PCBs in yesterday, imediatly grabbed the solder paste put a bunch of components down, reflowed them and everything looked good.  The power supply was actully very stable, even the components that didn’t have leads looked to be good.  I did know of some errors on the board such as not running VCC, GND, and RST to the ISP header.  Tying AREF to VCC rather then decoupling it. Fixed thoes issues, in the case of AREF I just cut the trace and moved on, no decoupling added. Oh an the biggest oversight on the board design was I left off the power connector.

Many attempts at fixing a non-existent hardware problem.

Many attempts at fixing a non-existent hardware problem.

Imediatly after getting everything fixed, and hooking it up to my ISP programmer I started getting the message that was going to haunt me for the next 24hrs or so.

avrdude: Device signature = 0x000000
avrdude: Yikes! Invalid device signature.

I tried everything, followed every trace, added decoupling caps everywhere!  Finally I decided I must have fried the chip when reflowing it and built up another board.  Same results (this one the power supply wasn’t nearly as clean though, need to fix that).

MOSI - Blue, MISO - Yellow , The slave would answer but would fail to read the signature correctly.

What was really bugging me is that I was seeing traffic on both MOSI and MISO which ment both devices were talking to eachother at some point.  I decided it must be something with the board design, went back to the computer and checked everything.  Ran across a couple of posts that mentioned SPI clock speed being an issue, as these are new devices they are set to run off the internal oscillator which is 8mhz, with the divide by 8 fuse set resulting in a 1mhz clock.  Come to find out the default SPI rate in avrdude is  roughly 1mhz which will work for devices running at 4mhz or higher.  Setting the SPI clock down caused avrdude to imediatly recognize the chip as valid on both boards I built.  Tomorrow will be filled with trying to get a bootloader on them, and seeing what if any data I can get in and out of the sensors on the chip.


Homemade Flex Circuit Boards

Published on July 24, 2011, by in Hardware.

DSCN0853

A while ago I came up with an idea for a project that seemed to require a flexible LED matrix. I could not find any comerically available, and even flexible LCDs aren’t nearly as common as I would expect. Getting a custom flexiable PCB created is possible, but pretty expensive and not exactly easy. Seeing as a LED matrix is a pretty simple circuit I started looking around for a way to make something at home.

(more…)


Arduino bootloader for Atmega 1284P

Published on June 26, 2011, by in Arduino, Software.

Arduino Atmega1284p bootloader @8mhz

When I was running into some issues of running out of sram on the atmega 328 I started to look at alternative chips, unfortunally the next chip up in the standard line is the atmega 2560 that is used in the Arduino Mega. Since I was focusing on sram i was mainly concentrating on that aspect for my next chip. The 2560 has 8k sram, which is nice ( compared to the 2k in the 328 ) but I saw the 1284P which has 16k. Before ordering some i looked around to see if anyone had put a arduino bootloader on it, and there were a number of people tinkering with them on the arduino.cc forms so I went for it.

The main issue I was running into was that everyone on the forms wanted to run their chips at 16mhz or 20mhz, way faster then the 8mhz I use. So, this ment no using or even trying the .hex files posted by others. It was pretty clear from this thread, that the direction to go would be a modified Sanguino bootloader. The Sanguino project is a modified arduino stack ( bootloader and wireing library ) for the atmega644 which is the same class of processors and is pin compatible with the 1284.

I had the timing issues with the clock change sorted out pretty early, but was still having issues getting the bootloader to write code into the flash. I could see code going from serial, to buffer, to page buffer, but the page just wasn’t being written by SPM into flash. I believe my main issue was the calculation of where the boot section actually started. When you look at the fuse descriptions they tell you where the boot section should start. For example I am using a 2048 word boot section. What they don’t make clear is that the address they give you ( 0xF800 ) is in words as well, then when you specify the load point to avrdude it is in bytes. This is probably something I should have found sooner, epically since this is the main problem referenced on the forms. So, when you load your application into the wrong section say 0x7C00 it will still run ( assuming your chip is otherwise blank ) since it is the first instruction in memory, but when it hit the SPM call, it will fail since SPM is only allowed in the bootloader section.

Here is the files that ended up working for me, see the form above for where they came from:

  • ATmegaBOOT.c
  • Makefile
  • ATmegaBOOT_1284P-8mhz.hex
  • UPDATE: Broken Links fixed.


    New Toy

    Published on March 12, 2011, by in Arduino, Gear.

    DSCN0837
    I got my first digital oscilloscope today, Ended up going with a Rigol DS1052E which seems to get great reviews around the net for a cheap scope. At about $400 it’s not the cheapest one around, but also far from the most expensive. I would say my tipping point was David’s teardown over on eevblog.com where he found exceptional build quality. I’m not going to do a full review, there are plenty of people who have done that, there is probaly more infomation on this scope on the internet then any other.
    (more…)


    GPX Library Bug

    Drive-022711
    Ran into a bug in my GPX Library that produced some interesting results. The problem manifested itself as what initially looked like half my data from a test drive being currupted, I initially was thinking it was a memory problem, or data being currupted in the I2C transfer. After looking at the tracks for a while trying to figure out how they got currupted I noticed that the point where the data went from clean to corrupt appeared to be level. When I focused in on these points they were in fact exactly at 43deg latitude. I then noticed a small piece of what looked to be clean data a bit north of the 43deg point. Uppon inspection clean data was at 43.10000 deg latitude. It didn’t take long to realise that I had not padded the fraction part, so 43.00001 was going into the file as 43.1
    Drive-022711-fix
    I went back to the source file and quickly fixed them with ‘sed’ and the result is a much cleaner track.
    Drive-022711-2
    And when over layered with OSM (http://www.openstreetmap.org/) data the track appears to be very accurate!


    GPS Logger Hardware v3.1

    DSCN0811
    Bit of a delay moving on this project, mainly because an error in the board I was building to mount the SUP500f GPS to had an error which fried it. Since sparkfun stopped selling SUP500f I had to find another GPS module. I ended up not going with the recommended replacement mainly due to the odd SMT connector in the middle of the device, I have no reason to this but it just felt like that would not work very well. (more…)


    GPS Logger Hardware v3

    MainBoard-v3

    Well this is not as much a new version but moving the components off the breadboard. It has always been my intension to use the small prototyping area on the microSD shield for my first revision of the hardware. All in all it has worked out well, the shield is for the most part the exact right size, nothing is too tight, but yet it is still small enough to fit in a small box along with the LiPo battery.

    (more…)


    Arduino Producer-Consumer Library v0.1

    As I mentioned in my last post I have cleaned up the Producer-Consumer library I started yesterday. It now includes the Producer class and some examples.

    Technically I believe the Producer::writeBuffer(…) method should report back that the buffer is full so that the Producer stops writing to the buffer until the Consumer has read something from the buffer. The particular use I have for this I am more interested in the most recent values rater then stale values in the buffer so if the buffer overflows it will send a buffer overflow message to the Consumer on the next read, then reset the buffer ( _buffRead = _buffWrite ).

    (more…)


    GPS Logger Hardware v2

    Due to some memory and timing issues with my attempt to do everything on a single processor I have split the tasks into two processors. There is one processor dedicated to parsing the info from the GPS as well as any other sensors which will be added later. The other processor takes the input from the sensor processor then builds and writes the GPX file to the microSD card.

    MainBoard-v2
    (more…)

     
    credit
    © Ryan M Sutton, 2015